It’s October, and winter is in the air! In Sweden, that means you hunker down and prepare from the oncoming arctic darkness. Since Swedish infrastructure survives this just fine and food isn’t a problem, that means it’s time to build toys, er… models!
I’ve written about models railways on and off on this blog for a few years. However, last year we moved into an apartment large enough for me to dedicate a room to a railway. No more cramped lofts!
Over the next few months, I’m planning to slowly build up a scenic model railway layout complete with towns, forests, lakes and so on. Turns out this quite a huge undertaking, and I’ve already spent a month planning and starting the build. Here we go!

InterCity 125 and Mallard.
Planning
The track, once properly laid, will be pretty much permanent - surrounded by scenery, attached to point motors and have its power lines soldered in. Because of this, make sure you take your sweet time settling on the layout!
I used an app called RailModeller to try various layouts on the computer. Once I’d settled on a rough design, I bought the track plus extras (RailModeller will give you a list of exactly what track you need to create the layout you’ve made) and plonked it down on the board. Inevitably, you’ll tweak the layout once you see it in real life - make sure you keep your changes in sync with RailModeller so you have an accurate inventory of track, and so you can try virtual changes at any time.
Once you have trains running around track set loosely on the table, start asking some questions:
- Is the track too dense? You need space for scenery.
- Is the track too sparse? After all, it is a model railway?
- What’ll go in that gap? How about over there?
- How about more interesting features like tunnels and bridges?
- Is there a station?
- Is there enough storage space to park trains when not in use?
- Is there at least one complete loop so you can set a train running on its own?
Once you’re settled on a layout that’ll make a good model, it’s time to make the track more permanent so you can build it!
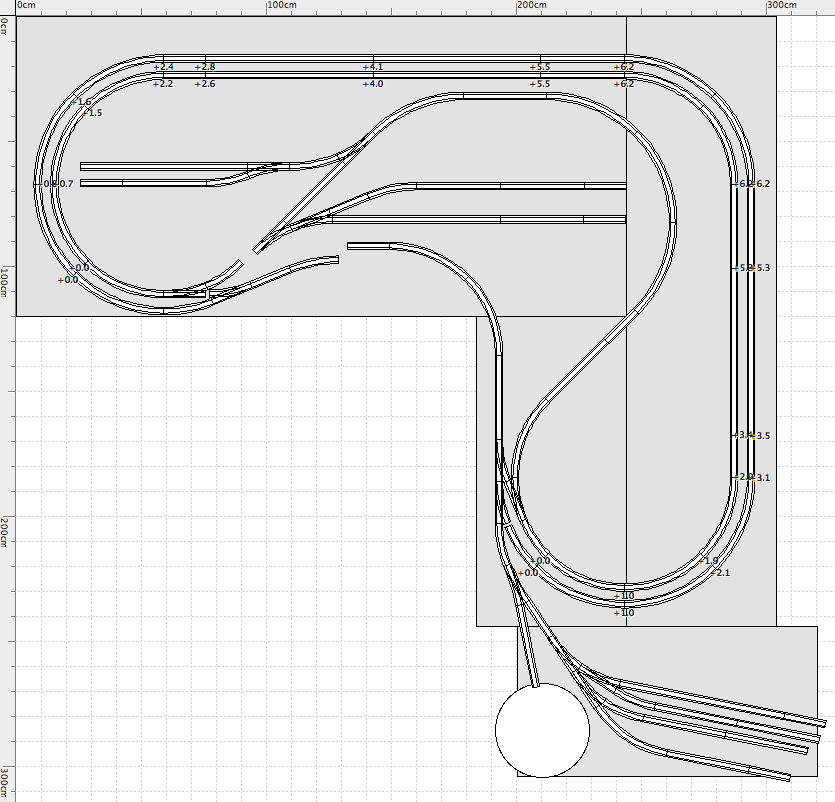
My final layout in RailModeller. Real life is a little more flexible than RealModeller, so it’s ok if things don’t exactly line up.
Assembling
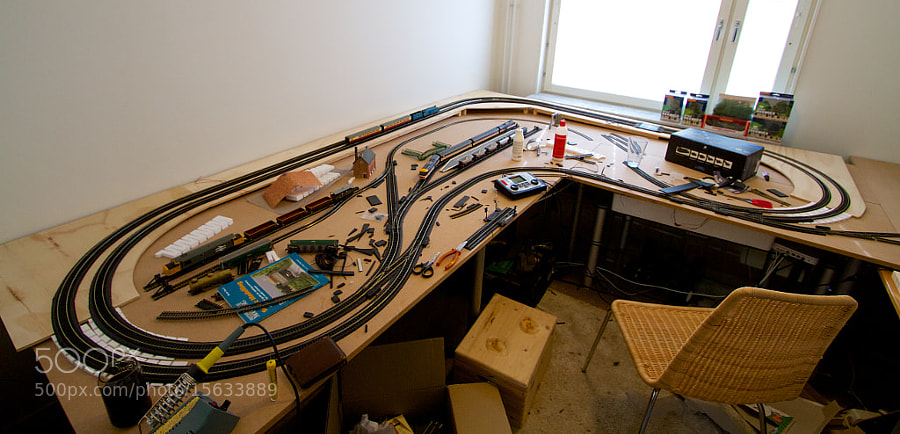
Things will get messy when you start assembing the layout!
Electrical
My layout is digital, powered by a system called DCC. DCC is a standard that uses AC current to power the trains and connected accessories. Each train/accessory has a unique address, and commands to them are encoded by varying the frequency of the AC current. This makes the electrical component of the layout slightly more fragile than a traditional DC system, so the layout is wired with a “master” wire running underneath the board, connecting to the track every few metres by smaller wires soldered to the track and passing through holes in the board.
The motors connected to the points are connected to the master wire directly rather than to the track, again through holes in the board.
Ramps
The ramps are made from 9mm plywood, strengthened by thicker timber underneath where appropriate. The drop from the point the 9mm plywood hits the board to the board itself is done using a polystyrene gradient from Woodland Scenics.
When designing and building ramps, it’s important not to make them too steep - about 4% is the steepest you can realistically get away with!
Track Bed
To keep the trains running smoothly and quietly, it’s important to have the track running on a foam or cork bed. I used track bedding once again from Woodland Scenics.
This will likely be the most tedious part of the initial build of the layout - it took me a few days to put the bedding on mine. The bedding needs to be cut and curved correctly then glued onto the track. Points are even harder!
…however, once it’s done it’ll be clean, tidy and smooth running.
Controlling
As mentioned earlier, my layout runs using a digital system called DCC. My controller is fairly normal looking, with a little UI to choose which train or accessory you’d like to control. While controlling trains like this is a lot of fun, controlling accessories is less so. There are thirteen sets of points on my layout, and unlike trains, they can’t be named. When I need to switch a point to drive a train into a siding, it’s often difficult to remember if that point is number 8 or 9.
This is where a piece of software called RailMaster comes in. Plug in the controller via USB and you can use it to build a rough version of your layout, telling it which points are where. Once you’re done, you can click the points on the map of your layout to switch them.
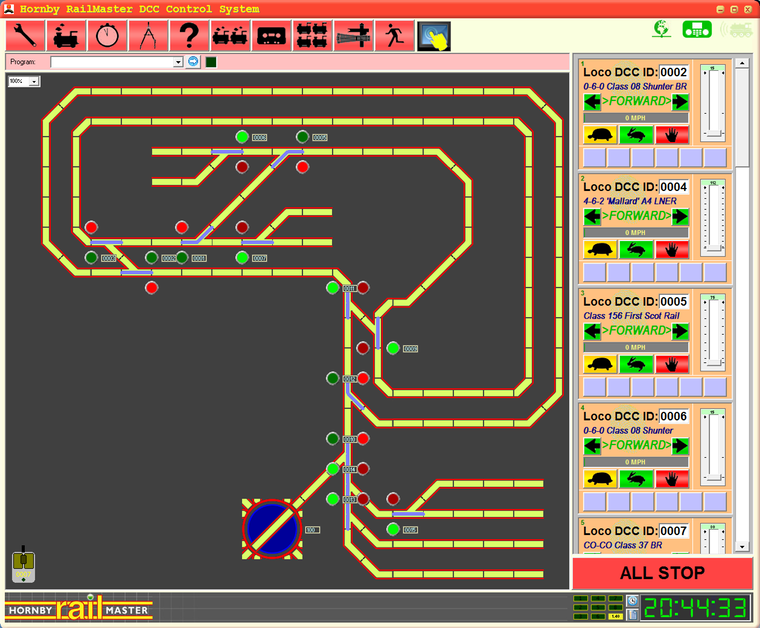
My layout in RailMaster.
The software can also control the trains and runs alongside the controller, allowing you to switch between the software and the controller as you wish.
Next Steps
And with that, my track is completely assembled, ready for the arid wooden plains to be converted into lush forests and busy towns.
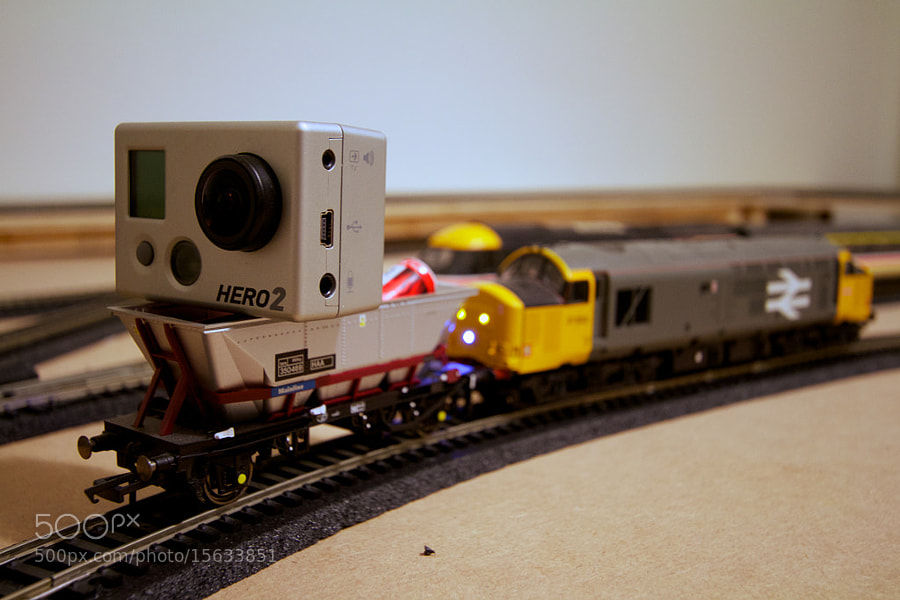
And obviously, I didn’t attach my GoPro to a train and make any stupid… oh, who am I kidding?
Time to start stocking up on fake trees!